Friday, December 21, 2012

Hot Roasted Artichoke Dip with Spinach and Asiago Cheese with Herbed Pita Chips

Dear Jess,

Oh man. Christmas is fast approaching, and the 'party food' lists are being completed.

Last night my cousin Mark came for a visit. He is visiting from Alberta until Christmas. Last time he visited I completely ran out of time, and couldn't get together anything worth serving. The chips were stale, the coffee was week, I had to ask someone to pick up veggie dip for the few veggies I had in my fridge... It wasn't tasty. It wasn't pretty. Basically, it was something from my nightmares. I decided to do a 're-do'.

This time I had a beautiful, large veggie tray with dip, some chocolate dipped pretzels, and this artichoke dip with pita crisps that I seasoned and made crispy in the oven. We demolished everything! It was so delicious! And just for the record, I had fresh ground non-weak coffee, tea, eggnog, beer, wine and juice to serve for beverages. I think I redeemed myself.

I have decided to pay closer attention to my 'kitchen inventory' these days. It is forcing me to take into account what I already have, and try to find recipes that include said items. This Artichoke Dip is a result of this searching. I had a can of artichokes left over from some other recipe I tried quite a while ago. Needless to say, I'm glad I did! As mentioned before, we demolished this dip! And this is saying something, because this recipe makes a fair amount of it!

Hot Roasted Artichoke Dip with Spinach & Asiago Cheese 
from The Looneyspoons Collections by Janet and Greta Podleski, Hearty-Choke Dip, Page 4
1 can (14oz/398mL) artichoke hearts (not marinated)
1/2 large yellow sweet onion, coarsely chopped
3 large cloves garlic, peeled and cut into thirds
1 tbsp olive oil
Salt and freshly ground black pepper to taste
1 can (19oz/540mL) no-salt-added white kidney beans, drained and rinsed
1 cup light (5%) sour cream (I used Fat Free)
1 tub (8oz/250mL) light garden vegetable cream cheese (such as Philadelphia brand)
1/2 tsp grated lemon zest
4 or 5 dashes hot pepper sauce
1/2 pkg (10 oz/300g) frozen spinach, thawed, squeezed dry and chopped (I used the whole 10 oz package. I love spinach!)
1 cup packed shredded Asiago cheese, divided (You can use Parmesan or Romano cheese instead. I used a combination of the three.)

1. Preheat oven to 425F

2. Drain artichokes and pat dry using paper towels. Cut artichokes in half. Place artichokes in a small casserole dish or baking pan. Add chopped onions and garlic. Drizzle with olive oil and sprinkle lightly with salt and pepper. Mix well. Roast uncovered for 30 minutes, stirring once, halfway through roasting time.

3. While vegetables are roasting, place kidney beans, sour cream, cream cheese, lemon zest and hot pepper sauce in the bowl of a food processor*. Whirl until smooth.

4. Remove artichoke mixture from oven. Reduce oven temperature to 375F. Let vegetables cool for 5 minutes, then add to ingredients in food processor. Pulse on and off until mixture is well blended but still slightly lumpy. Transfer artichoke mixture to a bowl and stir in spinach, a pinch of black pepper and all but 2 tbsp Asiago cheese. Spoon mixture back into casserole dish. Top with remaining 2 tbsp asiago cheese.

5. Bake uncovered on middle oven rack for 30 minutes, until mixture bubbles around the edges and top turns a light golden brown. Remove from oven and let cool for 5 minutes before serving. It's hot! Serve with whole-grain pita chips or crackers.

*I don't have a food processor, so I just used my blender.


Pita Chips
adapted from allrecipes.com
4-5 whole wheat pita breads
1/2 cup olive oil
1/2 tsp fresh ground black pepper
1 tsp garlic powder
1/2 tsp dried basil
1 tsp dried parsley

1. Preheat oven to 400F.

2. Cut all pita bread into whatever sizes/shapes you want your chips to be. Place them on a lined cookie sheet.

3. In a small bowl combine the remaining ingredients and mix well. Brush each pita piece with oil mixture.

4. Bake for 5-7 minutes, or until lightly golden and crispy. Watch carefully, as they brown easily!


I prepared the dip the day before (minus baking it.) Because of this, it was colder from being in the fridge over night, so I baked it for an extra 10 or 15 minutes. It still turned out amazing!

The chips were really yummy. The herbed seasoning was not very strong. They had a nice and subtle taste to them, and made the house smell delicious.

I hope you're not too busy, and you are finding time to relax during your holidays. I miss you and am really excited to see you again (hopefully soon!)

Love,


Wednesday, December 5, 2012

Creamy Parsnip Celery and Apple Soup

Dear Jess,

My days lately have been fairly uneventful. But I am thankful for the time to meditate. I still love how things happen that you can't explain. I love that we don't know what is to come next. I love that all surprises are unexpected. This soup is a good example. Caitlin came last minute for a visit, which meant she was able to accompany me on my hair appointment last week. There, we were looking through some magazines while waiting for my hair to colour, and I found this soup. I took a picture of the recipe with my phone, and remembered it only yesterday. This was perfect timing, as I was planning on doing groceries.

I made this soup yesterday but was unsure as I was not feeling well and my senses were a little off. I believe when Jason came home I said 'I made a weird soup, baby... I'm not sure about it.' We went on a date and I didn't think about the soup until I went to make my lunch today. I decided to give it a chance.

Today, (to my utmost pleasure!) my lunch included:

Creamy Parsnip Celery and Apple Soup
from a magazine in Van Gogh Design Hair and Spa
(I think it was Everyday Living, December 2012)

2 tbsp unsalted butter
1 leek (white and light green parts), washed and sliced
1/4 tsp ground ginger
Pinch salt
1 lb parsnips, peeled and sliced
3 ribs celery, sliced
1 granny Smith apple, peeled, seeded and chopped
3 cups sodium-reduced chicken broth
3 cups water
1/4 cup whipping cream (35%)
2 tsp Dijon mustard
2 tsp cider vinegar

1. In a large pot, melt butter over medium heat, cook leek, ginger and salt, stirring occasionally until softened, about 8 minutes.

2. Stir in parsnips, celery and apple; cook, stirring occasionally, for 3 minutes. Add broth and water; bring to boil. Reduce heat and simmer until parsnips are tender, about 20 minutes. Let cook for 10 minutes.

3. In batches in blender, puree soup until smooth; return to pot. Sitr in cream, mustard and vinegar; reheat to serve.


I must have been distracted while making my list, as I forgot to add celery to my list. Never fear, I had some carrots which I added instead. I'm sure celery would be delicious, but the carrots were tasty as well.

I am so excited to see you in a couple days! I hope your preparations are going well.

So much love,


Sunday, November 25, 2012

Sunday Snack: Tuna Patties with Garlic, Lemon Aioli

Dear Jess,

It was so wonderful to see you the other night, even if it was for only a couple hours. I cherish our 'snuggle' times.

My plan today was to make Jamie's Shortbreads. As it turns out, I had to wait for my butter to come to room temperature before I could start. Thus, I tried this quick little number. It comes from a cookbook that my mom picked up at Costco called Everyday Paleo Family Cookbook. It's part of a new 'eating lifestyle' that is fast spreading. I like the concept as it falls in with eating whole foods, and cutting out refined sugars, flours and preservatives. I guess it's not so much new as 're-invented'. It has recipes for all sorts of dressings, mayo, ketchup, BBQ sauces etc. This book is beautifully put together, with an index of the names of the recipes paired with a picture of it! I have made my grocery list to include a couple meals from this book.

I can still taste this one! Jason and I just finished eating it 10 minutes ago. I didn't have high hopes for it, as it looked too simple to be delicious. I was (happily) wrong.

 
Tuna Patties with Garlic, Lemon Aioli
From Everyday Paleo Family Cookbook
3 cans of Tuna packed in water and drained
2 eggs
1/2 tsp dried dill
1/2 tsp sea salt
1/4 tsp black pepper
2 tbsp coconut oil

1. Mix the tuna with eggs, dill, salt and pepper.

2. In a large skillet, heat the coconut oil over medium to meium-high heat. make sure the oil is nice and hot!

3. Form the tuna mixture into 11-12 small, slightly flattened patties and cook in the hot oil for 2-3 minutes per side.

4. You will not be able to fit all 11-12 in your pan at the same time, so you might have to add more oil for each batch. Make sure the patties are brown before you flip them so that they hold together! Serve with my Simply Coleslaw (p. 202) and topped with Garlic Lemon Aioli (p.72).

I'm sure you understand the benefits of coconut oil. I love that you can use it on medium to high heat with no fatty, unhealthy things happening to the oil, or your food. (It is expensive, but I wait until the Bulk Barn has a sale.) It created a really nice 'deep-fried' browning on the patties. So long as you leave them long enough these patties do stay together. 

Fortunately, we had just come from my mom's last night with some left over coleslaw, so I just pulled that out of the fridge. I haven't made my own mayo yet, so I simply used some olive oil mayo, minced garlic, and lemon juice for the aioli. Just keep mixing until the flavour is where you want it!

I also realized you didn't take Beauty and the Beast with you! I will try to remember to bring it for you Christmas party.

Lots of Love,

Tuesday, November 20, 2012

Maple-Garlic Marinated Pork Tenderloin

Dear Jess,

The weather today is so amazing! I just went for an hour long walk with a friend through the zoo. The sun was just warm enough to warm your back as your walking, and the air was just chill enough to turn your cheeks pink. So beautiful.

Yesterday I was at home thinking how long it had been since I made an actual 'meal' dinner for Jason... when I realized it has been too long! No Frills had Pork Tenderloin on sale, so I quickly looked up some tasty-looking marinades. I had 5-6 hours for it to sit in the fridge. Perfect!

Maple-Garlic Marinated Pork Tenderloin
adapted from this recipe
2 tablespoons Dijon mustard
1 teaspoon sesame oil
3 cloves garlic, minced
lots of fresh ground black pepper
2-3 tbsp low sodium soy-sauce 
1 cup maple syrup
1 1/2 - 2  pounds pork tenderloin
1. Combine mustard, sesame oil, garlic, pepper, soy-sauce, and maple syrup. Place pork in a large Ziplock bag and add marinade.  Chill in refrigerator for 5-8 hours. (You could also leave it over night if you want)

2. Preheat oven to 375F. Remove pork from marinade and set in a small oven-safe dish. Pour marinade over pork and cover with foil. Bake for 45-60 minutes.


This recipe is so delicious and so easy. Next time I will serve it with rice or potatoes. A little fresh ginger would be delicious added to the marinade as well. 

Love,


Monday, November 12, 2012

Homemade Spicy Sausage Alfredo

Dear Sally,

I can totally relate to the feeling of busy. I too often give in to the thought "I don't have time" and get away from cooking. Today was my report card writing day and after I finished my rough copies at noon I decided to jump into the kitchen. Jesse brought home four . .  FOUR pumpkins from his mother's store. He asked if I could use them. My first reaction was excitement over all of the things I could make with pumpkin. That was before I cut, seeded, peeled and boiled it all. Needless to say I had enough of pumpkin after that. I put the pumpkin aside and decided to work on dinner.

Jesse asked me for a creamy pasta and so I opted for an Alfredo. It smelt amazing when I was making it. This is not a dish that can be modified for someone with my allergies and still taste amazing. The recipe comes from my head so it may not be precise but I am sure that it will still taste delicious.

Ingredients

2 tbsp. butter
2 tbsp. flour
salt and pepper to taste
2 cloves garlic
2 cups 18% cream
1 cup shredded old cheddar cheese
2 spicy Italian sausages1 package pasta

Directions

1. Start boiling your salted water for the pasta. When the water comes to a boil prepare the pasta as directed.

2. Cook the Italian sausages over medium heat. Slice and cook again until browned. Set aside.

3. Heat the butter in a small saucepan. When it is melted add the garlic and stir for about 30 seconds then add the flour and stir constantly. Make sure you have the cream near by. Add the cream to the flour mixture a little at a time until it is all added. Stir continually and bring to a boil over medium heat. When the mixture is boiling and begins to thicken add the shredded cheese and stir. Remove from heat and set aside.


4. Combine all ingredients in a large bowl and toss. Serve while hot.


I hope you and Jason are staying nice and cozy in Peterborough. Can't wait to see you soon.

Love You!


Wednesday, November 7, 2012

Italian Sausage and Beef Lasagna

Dearest Jess,

I am sick of always saying 'What a busy time!' I feel like such a wussy wimp! Oh well. Things have been busy, but my school  pictures job has tapered off and I am able to breathe as I contemplate what is to come next. I am getting caught up with housework and cooking. Laundry is finally manageable, and my kitchen has been thoroughly disinfected and wiped down. Hurrah!

This is the second time I have made this recipe. It's from Eat Shrink and be Merry, makes your house smell amazing, and is delicious! I recommend this to anyone!

Ooh-la-la-sagna!
From Eat Shrink and be Merry, Page 137

8oz (227g) light mild Italian Sausage
8oz (227g) extra-lean ground beef
1 cup chopped onions
2tsp minced garlic
1 tsp dried oregano
1/4 tsp crushed red pepper flakes
1 jar (22oz/700ml) tomatoes with Italian herbs, undrained, cut up
1/3 cup chopped fresh basil leaves (I used Thyme this time)
1 tbsp balsamic vinegar
1/2 tsp freshly ground black pepper

12 uncooked whole wheat lasagna noodles
2 cups light ricotta cheese (16oz/454g)
1 pkg (10oz/280g) frozen spinach, thawed, squeezed dry, and chopped (I used fresh spinach)
1/3 cup grated Parmesan, Romano or Asiago cheese
1 egg
1 1/2 cups packed shredded light mozzarella cheese (6oz/170g)

1. Spray a 9 x 13-inch baking dish with cooking spray and set aside.

2. To make sauce, spray a large, non-stick pot or deep, non-stick skillet with cooking spray. Remove casing from sausage and break into small pieces in skillet. Add ground beef, onions, and garlic. Cook an stir over medium-high heat until meat is no longer pink. Stir in oregano and crushed red pepper flakes. Cook 1 more minutes. Add pasta sauce, tomatoes, basil, vinegar, and pepper. Bring mixture to a boil. Reduce heat to low. Cover and simmer for 20 minutes.

3. While sauce is simmering, cook lasagna noodles according to package directions. Drain. Rinse with cold water and drain again.

4. In a medium bowl, mix together ricotta, spinach, Parmesan cheese, and egg. Refrigerate until ready to use.

5. To assemble lasagna, spread 1 cup meat sauce over bottom of baking dish. Top with 4 lasagna noodles, cutting pieces to fit if necessary. Spread 1/3 remaining sauce over noodles, followed by 1/3 mozzarella. Top with 4 more noodles, 1/3 sauce, all of the ricotta mixture, and 1/3 mozzarella. For top layer: 4 noodles, 1/3 sauce, 1/3 mozzarella.

6. Cover lasagna with foil and bake at 375F for 35 minutes. Uncover and bake for an additional 15 minutes. Uncover and bake for an additional 15 minutes. Let lasagna stand, uncovered, for 15 minutes before serving.


I love you and miss you, as always. I am thrilled to hear that you two are able to settle down a little bit. I can't wait to come and see what you've done to your house and have nice long visit!

Love,


Wednesday, October 3, 2012

Curried Squash Soup


Dear Sally,

The dust is starting to settle. My parents how now successfully married off both of their children. It was a beautiful weekend in Ottawa and David and Steph looked very happy.

I hadn't planned ahead for meals this week so this soup was actually just a random act of cooking. Jesse brings home random vegetables for me from his parent's garden . . . hence this soup.

Ingredients
(adapted from The New Moosewood Cookbook) 
3 cups butternut squash
2 1/2 cups chicken stock
1 cup orange juice
1 tbsp. butter
1 cup chopped onion
2 medium cloves garlic, minced
1 1/4 tsp. salt
1/2 tsp. ground cumin
1/2 tsp. cinnamon
1 tsp. fresh ginger
1/4 tsp. dijon mustard
1/2 cup lactose free yogurt
dash cayenne pepper
fresh lemon juice

1) Preheat oven to 375 F. Split the squash lengthwise, remove seeds, and place face-down on a lightly oiled tray. Bake until soft (about 40-50 minutes). Cool, then scoop out the insides. Measure out 3 cups worth and place in a large saucepan. Add the chicken stock and orange juice and bring to a boil.

2) In a frying pan cook onion and garlic over medium heat until clear (about 5-8 minutes). Remove from heat and add to squash mixture. Add the rest of the ingredients to the pot. Using a hand blender, puree soup until it is a nice smooth texture. Serve and enjoy!


I am sure that you will be busy with family this Thanksgiving weekend. Say hi to everyone for me!

Miss you lots,

Jessica

Monday, October 1, 2012

Jamie Oliver's Chicken and Leek Stroganoff

Dear Jess,

What a busy last couple of weeks! Fortunately, I have today off. This means I have time to write this small little post.

I made this recipe quite a while ago. Jason wasn't a huge fan because of the mushrooms, but I truly enjoyed it. It is simple and comfortable, and you know how I feel about cooking with wine!

Chicken and Leek Stroganoff
From Jamie's Food Revolution, Page 34
(Serves 2)

3/4 cup long-grain or basmati rice (I used long-grain brown rice)
1 large leek
a big handful of crimini or oyster mushrooms (or your favourite kind)
2 chicken breast fillets
olive oil
a pat of butter
a glass of white wine
freshly ground black pepper
a bunch of fresh parsley
1 1/2 cups heavy cream (I used 5%)
1 lemon

1. Pour boiling water from the kettle into a large pan, place on a high heat and add a pinch of salt. Add your rice, bring back to a boil, then turn the heat down slightly. Cook for the length of time given in the instructions on the package. Cut both ends off the leek, quarter lengthways, slice across thinly, then wash well under running water. Slice the mushrooms. Slice the chicken breasts into little-finger-size pieces.

2. Put a large frying pan on a high heat and add a good lug of olive oil and a pat of butter. Add the leek to the pan with the white wine, a small glass of water; and a good pinch of salt and pepper. Let it bubble away for 5 minutes, covered loosely with a piece of aluminum foil. Meanwhile, finely chop the parsley, stalks and all. Remove the foil and add the chicken strips, most of the parsley, the cream, and the mushrooms. Stir, bring back to a boil, then turn the heat down to medium and simmer for 10 minutes. Drain your rice. Just before serving, cut your lemon in half and squeeze the juice of one half into the stroganoff. Season to taste.


3. Spoon some rice onto each plate and top with the stroganoff. Scatter with the rest of the chopped parsley. Serve with the other lemon half, cut into wedges.


I love you and miss you! I hope your kindergartens are doing well, and you're not overwhelmed with is all. I can't wait to see you again!

So much love,

Monday, September 17, 2012

Light Chicken Salad

Dear Jess,

What an awesome last minute visit on Saturday! I'm sorry I was not up to say goodbye on Sunday morning... I hope you slept well and made it to church on time!

This recipe got us through a quite a few lunches this summer. It was popular especially at the cottage. I'm not a huge fan of 'mayo-based salads' but this one is surprisingly light and allows you to taste the other ingredients besides the mayo. This has been added to 'the binder' and will be used many more times I'm sure.

I doubled the original recipe. It easily feeds 10-12 people for a lunch.

Chicken Salad
adapted from this recipe
2 Rotisserie Chickens, stripped and finely chopped
2 stalks of celery, chopped
6 scallions, finely chopped
3 tbsp (heaping) fresh tarragon
2 cups mayo (I use the 50% less fat olive oil mayo)
2 tsp Dijon mustard
4 tsp Lemon juice
4 tsp salt
Black pepper to taste

1. Combine chicken, celery, scallions and tarragon in a large bowl.
2. Mix mayo, Dijon, lemon juice, salt and pepper in a smaller bowl. Add to your chicken mixture. Stir well.
3. If desired you can serve immediately, or let sit in the fridge for a couple hours to let the flavours combine.
4. Serve on bread, or wraps with desired toppings!


Enjoy!

Love,

Friday, September 14, 2012

Pearl Barley, Savoy Cabbage and Chorizo Soup

Dearest Jess,

I am so excited for our Skype date tomorrow! I haven't seen you in ages!

As you have noticed, the weather is cooling down. This means the old soup, chili, casserole, stew etc recipes get pulled out and jackets, scarves, rubber boots and long pants get put on. We had our windows open all summer and enjoyed the summer breezes. We have now closed them to enjoy the toasty warmth of the house, against the chilly, rainy spectacle we find outside.

This recipe has become a sort of favourite for me. It is another one from Tana Ramsay's Home Made cook book. The last recipe I did from this book was so delicious. It was a Ham, Spinach and Gruyere Croissant Ring. Very tasty!

I have fallen in love with this soup because of its simplicity and adaptability. Tana says:

'So when following any recipe, mine included, my advice would be to not get hung up on quantities - if there are three mushrooms left in the bag more than the recipe calls for, chuck them in too, or if the recipe demands two celery sticks and you have only one, don't rush down to the supermarket to buy it. Getting a meal on the table for the family after a long day at work or doing other things can be stressful enough, so why make it more complicated than it needs to be?'

You know this is my view-point as well, so this soup I have made a little different every time. I will share the original recipe as it is in the book, but remember to have fun with it!

Pearl Barley, Savoy Cabbage and Chorizo Soup
From Tana Ramsay's Home Made, page 12

3 tbsp extra virgin olive oil
2 red onions, peeled and finely chopped
2 garlic cloves, peeled and finely chopped
2 sprigs of thyme
9oz chorizo sausages, skinned and chopped into bite-sized pieces
1/2 Savoy cabbage, shredded
3.5oz pearl barley
squeeze of lemon juice
1 handful of chopped fresh parsley
salt and black pepper

1. Heat the oil in a large saucepan on a low-medium heat. Add the onions, garlic and thyme and cook gently for about 5 minutes, until softened but not coloured. Add the sausages and fry for 4-5 minutes until the oil begins to run. Meanwhile, put on the kettle to boil.

2. Add the cabbage and pearl barley to the sausages and pour in enough boiling water to cover everything generously. Bring to bubbling, then reduce the heat and cook gently for 50-60 minutes, until the barley is tender; top up with more hot water if the mixture gets too dry.


3. Add a squeeze of lemon juice and season with salt and pepper to taste. Toss in the parsley, stir through and serve in warm bowls with lots of crusty bread with butter.


Enjoy this one. It's very warm and cozy.

Love,

Thursday, August 30, 2012

Kale 'Chips'

Hello again!

I just wanted to share this little tid-bit of a recipe with you. It's nothing fancy, but they surprised me.

For a couple weeks now I have been hearing whispers about these 'Kale Chips'. That's right. Chips apparently made from kale. And I don't mean processed Kale. I mean Kale chopped and baked from your garden...

I had to try.

Kale Chips
Click here for recipe source

Kale
Olive oil
Salt

Preheat your oven to 325F.

With scissors, cut the sides (the leafy part) of the Kale from the stem. You don't want any of the center stem included. Cut the leafy parts into bite-sized pieces (or a little bigger because they shrink in the oven) and put them in a bowl. Toss with a tiny drizzle of Olive Oil (about 1 TSP), Salt and whatever other seasonings you want (I did Paprika.)

Lay on a non-insulated baking sheet lined with parchment paper.

Bake in oven for 5-10 minutes until crisp but not burnt! (I burned my first batch because I was not watching close enough... luckily I still have a tone of Kale in the back yard!)


Remove them from the oven and let cool slightly. Transfer to a bowl and eat them! Eat them all! They are so addictive!

That being said... I will not pretend to think they are a good substitute for chips. Jesse won't be impressed if you give him these instead of some Ruffles... however for the ladies, it is a nice little 'munchy' snack.

Have a good long weekend!

Love,


Tuesday, August 28, 2012

Healthy (and Delicious!) Cookies

Dear Jess,

Words cannot express how much I long to see you. I feel like we have so much to catch up on and share with each other.

Today has been lovely. It has been a wonderfully sunny and breezy day. I have all my windows wide open and fresh air is seeping into my house. This inspired me to browse my cookbooks, and within one I found an intriguing recipe that I had to make to see if it was any good. The result: success!

I found this one in the Quinoa 365 The Everyday Super Food cookbook that my mom picked up for me from Costco. Well... truth be told... I'm not sure it was for me... but it has ended up in my kitchen... so I'm going with it!

On page 131 you will find a recipe for Healthy Cookies. The only part of this recipe I don't like happens to be the name. They should be called Energy Bites or something a little more attractive. I, however, did not write this book. And thank goodness too, because I never would have been able to think this puppy up! As you already know, Quinoa is full of so many good things (it's a full protein, and a big source of fibre etc etc) that to add even more good things to these cookies is just a bonus! I look forward to sending these in Jason's lunch. They promise to give him lots of energy for his laborious days.


Healthy Cookies
from Quinoa 365, page 131

2/3 cup water
1/3 cup quinoa
1 cup butter, softened
1 1/3 cups packed brown sugar
2 large eggs
1 1/2 tsp pure vanilla extract
2 cups whole wheat flour
1 1/2 tsp baking powder
1 tsp baking soda
1 tsp ground cinnamon
1/4 tsp salt
1 1/4 cups quick-cooking rolled oats
1 cup flaked unsweetened coconut
1 1/3 cup sunflower seeds, unsalted
1/3 cup flax (ground or whole seeds)
1/3 cup sesame seeds

Bring the water and quinoa to a boil in a small saucepan. Reduce to a simmer, cover and cook for 10 minutes. Turn the heat off and leave the covered saucepan on the burner for an additional 6 minutes. Remove the lid and fluff with a fork. Set aside to cool.

Preheat the oven to 350F. Grease a large baking sheet, or line it with parchment.

Cream the butter with the brown sugar in a large bowl. Add the eggs and vanilla and mix thoroughly.

Combine the flour, baking powder, baking soda, cinnamon and salt in a medium bowl. Add the oats, cooked quinoa, coconut, sunflower seeds, flax and sesame seeds to the flour mixture and stir until well blended. Combine with the butter mixture and stir until well mixed. Roll the dough into 1 1/2 inch balls. Place 2 inches apart on the prepared baking sheet. Flatten each cookie slightly with the palm of your hand. Bake on the center oven rack for 8-10 minutes, until the bottoms are light brown. Allow the cookies to cool completely on the baking sheet. Store the cookies in a sealed container in the refrigerator for up to 1 week.


My house smells so good right now from these little darlings. (That's right... I couldn't wait another moment before sharing it with you... the last tray is still cooling behind me.) So easy. So yummy. Such a good idea.

Love,

Tuesday, August 21, 2012

Jamie Oliver's Sher Ping Pancakes

Dear Jess,

On Mondays I do the grocery shopping. So on Sundays I always ask Jason, 'What would you like to eat this week?' He then goes through some cookbooks and picks one or two things he would like to have. I then add a third 'new' thing that I would like to try to make.

This week I was craving Sher Ping Pancakes from Jamie's America. That's right. I'm back to Jamie. I missed him and his creative food genius. I have, in fact, made this once before when I first got this cookbook. Probably just over 2 years ago. I made them the day Jason asked me on our first 'official' date. I remember I had trouble with the dough and was interested to see if I could do better. Also: they are delicious. Jamie says:

'Sher ping translates as "pan-cooked filled pancake," and they are one of the best things I've eaten in ages. A lovely lady from the north of China taught me how to make them at her food counter in the Roosevelt Food Court. It sounds like a cheat to explain how to make these pancakes, but it's well worth mastering, because you can swap the pork for other delicious fillings like chicken or seafood.' - Jamie's America, page 49

If you make these (which I definitely think you should) keep in mind that you will need the whole afternoon. The dough has to sit for a couple hours, and then after stuffing them they need to chill in the fridge for 20 minutes before you cook them.

I doubled this recipe and used whole wheat bread flour instead of white. (I know... risky... but it turned out so good!) I am going to try to freeze half of them and see how they turn out. (One single batch will make 8. A double makes 16.)

On last thing that is very important... I find you need way more water or less flour. You want your dough to be really stretchy. Whenever I do it exactly like the recipe it's always too dry.

Sher Ping Pancakes
from Jamie's America, Page 49

For the dough
3 1/4 cups white bread flour, plus extra for dusting (I used whole wheat bread flour)
scant 1 cup water
1/4 cup vegetable oil (I used Extra Virgin Olive Oil)
sea salt and freshly ground black pepper

For the filling
14oz ground pork, the best quality you can afford
a handful of finely grated white cabbage (No Frills didn't have any... so I used Savoy cabbage)
a small bunch of fresh cilantro, leaves and stalks finely chopped
a thumb-sized pieces of root ginger peeled and finely grated
4 scallions, trimmed and finely grated
sea salt
freshly ground Szechuan pepper (I used Cayenne pepper)

To serve
sweet chile or hot chile sauce
soy sauce
2 limes, cut into wedges

Make the dough by mixing the flour, water, vegetable oil, a bit of pepper, and a pinch of salt with a fork. Then use your hands to knead it until smooth and elastic. Cover it with plastic wrap and let it rest for a couple of hours.

When you're ready to make your pancakes, mix all your filling ingredients together in a large bowl. Use your hands to really scrunch everything together, and season well with a good pinch of salt and Szechuan pepper.

Dust a clean surface with flour and cut the dough into 8. Divide your filling into 8 even piles. Oil a sheet pan and your hands. Pick up a piece of dough and create a patty like a mini pizza about 4 3/4 inches across and 1/2 inch thick. (I just do it as thin as I can while pretending I'm making a pizza with Dad's secret recipe dough.)

Take one of your piles of filling and pop it into the middle of the dough. Pat it flat with your fingers, then slowly stretch the edges of the dough out, folding them back in over the pork mixture. Do this all the way around and, once closed, press down on the stuffed pancake with your hand. It should be about 1 inch thick and 3 1/4 inches across. (mine were wider because I find it easier than doing it on the frying pan...)


Do the same with the other 7 pancakes, then lay them on your oiled sheet pan and put them into the refrigerator for about 20 minutes or so. After that, get a large dry frying pan on a medium heat. Add a tiny drizzle of oil and lay each pancake, folded side down, in the pan. Gently push down on them with a spatula to flatten them slightly. Keep doing this until they're about 1/2 inch thick and about 4 inches wide. Be careful that the pan's not too hot, though, otherwise your pancakes will brown before they're properly cooked through.

After about 4 minutes you'll have a nice golden color happening, so turn the pancakes over, push them down lightly, and cook them for 4 minutes on the other side. Only push down once on this side. When they're golden and crisp, the meat will be perfectly cooked, but you can always break one open to check.


To serve, pour some chile sauce into one bowl and some soy sauce into another. Pop a few wedges of lime on the side for squeezing over, and dunk away in your sauces. These pancakes hit all the right spots!


So yummy!

I have so much to tell you about Spain! The trip was incredible (duh!) and I will post an entry all about the food we tried once I get all the pictures together! I have already tried to make a couple of them at home!

I love you and miss you. I hope we can get together soon.

Love,


Wednesday, August 15, 2012

Onion Soup and Homemade Croutons


Dear Sally,

I feel like I haven’t been in my own kitchen in ages and that is probably because I haven’t. As you know Jesse and I decided to refinish our hardwood floors and it is quite an undertaking. After spending more than a week at other people’s houses I have been dying to get back into my own kitchen. My happy place.
           
While is displacement Jesse and I took a stroll through an onion field on his street that had just been harvested. We could still smell the scent of fresh onion in the air. Walking through the field we picked up a few of the onions that the machines had left behind and would soon become fertilizer. I knew immediately what I wanted to make with them. Fresh French Onion Soup!

Today while working on my plans for the 2012-2013 school year I took a break to make this delicious soup. It is the simplest thing and yet so delicious and meaty without  the need for beef or chicken

I know you are having an amazing time in Spain. I can’t wait to hear all about the sights, the laughs and of course the food.

Love


Onion Soup
Adapted from The New Moosewood Cookbook

Ingredients

2 tbsp. Earth Balance (this is a vegan product I use instead of butter)
4 large yellow onions sliced thinly
1 tsp. salt
1 tsp Dijon Mustard
a dash or two of thyme
4 cups water (or more if needed)

Directions

1.     Melt the butter in a large saucepan or dutch oven. Add onions and salt, and cook over medium heat about 10 minutes, stirring occasionally.
2.     Add mustard and thyme: stir and cover. Continue to cook very slowly about 35 more minutes. The onions will be exquisitely soft and simmering in their own liquid.
3.     Add water and more salt and pepper if needed. Simmer at least 10 minutes more. Serve topped with croutons and cheese.

Homemade Croutons

Ingredients

2-4 slices of bread or bun cut into cubes
1-2 tbsp melted butter
2-3 cloves garlic
salt and pepper to taste

Directions

1.     Melt the butter in a saucepan and add the garlic. Cook for about 1 minute.
2.     Add the bread cubes and salt and pepper. Stir to coat and toast.
3.     If needed you can toast the crutons further in the oven at 300 for about 10 minutes depending on the level of crunch you are looking for.

Monday, July 30, 2012

Moroccan and Rollin' Quinoa Salad

Dear Jess,

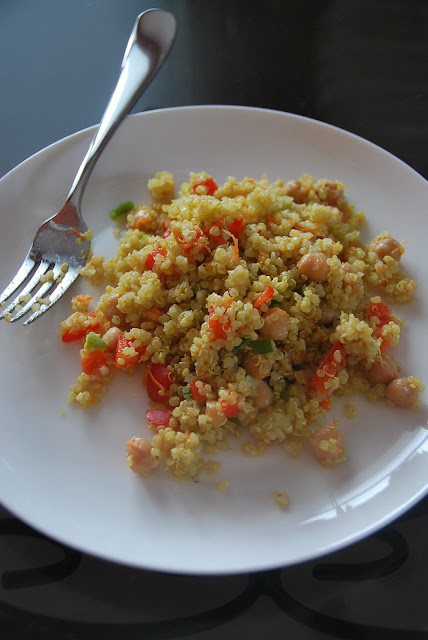
This Quinoa (pronounced keen-wah) Salad is so good that I made it last week and I am right at this minute making it again. As I sit here writing this entry (in our newly painted 'study/office/drawing room',) the Quinoa is in the pot boiling, and the aroma is floating through the house. (I also have bread baking in the bread-maker, so my house basically smells like heaven.) This is another gem from the Podleski sisters (The Looneyspoons Collection.) On page 38 you will find Moroccan and Rollin' Quinoa Salad.

I have fallen in love with this particular seed for many reasons. One being you can do so much with it, another being it's delicious, and most importantly: it is a full protein! Janet and Greta have a nice little description of it that I will share here with you:

"Though commonly referred to as a grain, quinoa is actually a seed of the goosefoot plant, a relative of leafy green vegetables like spinach and Swiss chard. Once considered 'the gold of the Incas,' Aztec warriors used quinoa to increase their stamina. It's not wonder: quinoa is a nutritional powerhouse! It has twice the protein of brown rice and contains all nine essential amino acids (nutritional building blocks that help form proteins and muscle and other tissue) - rare in the plant kingdom. That's why quinoa is winning the popularity contest among vegetarians and others who don't want to eat meal 'til the cows come home. All that protein plus tons of fiber make it a waist-watcher's dream, a diabetic's dream, a cholesterol-lowering dream and... well... a dream come true for anone who wants to put the best possible fuel in their body. The tiny seeds can boost energy and also contain lots of magnesium that can help prevent high blood pressure and osteoporosis. As an added bonus, quinoa is gluten-free, ideal for those with Celiac disease or other grain sensitivities." (page 38 of The Looneyspoons Collection)

So there you go! One major tip when buying quinoa: make sure you get 'prewashed' or 'prerinsed' quinoa. It will say this on the package. If you don't you have to thoroughly strain it.


Moroccan and Rollin' Quinoa Salad
From Janet and Greta Podleski's The Looneyspoons Collection

1 cup uncooked quinoa
2 cups reduced-sodium vegetable broth
1/4 cup dried currants (I didn't do this)
1 tsp curry powder
1 tsp ground cumin
1/2 tsp ground coriander
1 tsp liquid honey
1/2 tsp salt
1 cup canned no-salt-added chickpeas, drained and rinsed
1/2 cup each finely chopped red bell pepper, grated corrotts and peeled, diced English cucumber
1/3 cup chopped green onions
2 tbsp olive oil
2 tbsp freshly squeezed lemon juice
2 tbsp minced fresh mint leaves
1/4/ tsp freshly ground black pepper

1. Combine quinoa, broth, currants, curry, cumin, coriander, honey and salt in a medium pot. Bring to a boil. Reduce heat to low, cover and simmer for about 20 minutes or until quinoa has absorbed all liquid. Remove from heat. Let stand covered for 10 minutes. Fluff with a fork and leave uncovered to cool completely.

2. When quinoa is cool, transfer to large mixing bowl. Stir in all remaining ingredients. Mix will and refrigerate for at least an hour or two before serving. Tastes even better the next day!

This salad I eat most days for lunch and also include some in Jason's lunch. (He loves it!) It will last me about a week. I will likely make a big batch of this before I go to Spain as part of Jason's 'meal plan' that I will be leaving him.

I can't wait to see/talk to you soon. Hopefully before I leave, but if not sometime shortly after I get back.

Love,

Sally*

*(my signature is on my other computer which is giving me some problems lately...)


Tuesday, July 24, 2012

Chewy Chocolate Chip Granola Bars

Dear Jess,

We need to Skype soon! I want to hear everything about your honeymoon(s), and how co-habitation is going! Again... I am so excited for you!

I am almost as excited about these granola bars... but obviously not quite that excited. I have tried a couple different recipes over the years, and some have been rather tasty, but usually they are either too dry, too moist, or not yummy enough to bother making them again. This one, however, has won me over! If you are part of a 'peanut-free' school these will not due. I'm sure you could substitute the peanut butter for whatever you're allowed to use instead. Is it true that someone came up with an entirely nut free peanut butter twin but it tasted and looked so much like peanut butter that some schools banned it too in case it was mixed up?! Anyways... the point is: these are delicious.

I found it somewhere on the internet, but for the life of me I cannot find it again... good thing I printed it out!


Chewy Chocolate Chip Granola Bars
1 cup firmly packed brown sugar
2/3 cup peanut butter
1/2 cup liquid honey
1/2 cup butter, melted
2 tsp vanilla extract
3 cups quick-cooking rolled oats
1/2 cup shredded unsweetened coconut
1/2 cup sunflower seeds
1/2 cup craisins
1/2 cup wheat germ
2 tbsp sesame seeds
1 cup dark chocolate chips

1. Preheat oven to 350. Lightly grease 13x9 inch baking pan.
2. In a large bowl, combine brown sugar, peanut butter, honey, melted butter and vanilla and blend well.
3. Stir in remaining ingredients and mix well.
4. Press mixture evenly into prepared pan.
5. Bake for 15-20 minutes or until light golden brown.
6. Cool pan completely on wire rack (or in fridge)
7. Cut bars into desired size and shape.


Oh man. So tasty. Especially as an 'energy-boost' snack. I will be making these again for sure!


Love,

Thursday, July 19, 2012

Delicious Jambalaya

Hello Mrs Brickell!!

The summer is flying by. You are already married! So exciting! Congratulations again. Your wedding was beautiful and I am so glad to hear you were pleased with how it all came together.

I have learned something very important that has changed my grocery lists, meal planning and cooking habits. Jason eats a lot. A lot. So much. He works so hard during the day that his body can't keep any fat! He eats and then *slurp!* his body sucks up and burns off the energy almost instantly. I'm the opposite. I don't eat much. I mean I can eat a lot, but typically I don't. And my body holds on to all the fat.

I have gotten used to half a casserole dish of macaroni disappearing onto Jason's plate as one 'serving' of dinner. I have stopped being disappointed when a meal I thought would last a couple days lasts one. I have changed my thoughts from 'Oh dear... I can't keep up' to 'My husband likes my cooking!' And really, when it comes to it: I like a challenge. The grocery bill can get a little bigger, and I can attempt to have too much food in the fridge.

This Jambalaya recipe surprised me. It will become a regular for sure. This time I used sausage but realized I could use beans instead and it would still be delicious (and cut the cost almost in half!) It is spicy, so make sure you adjust it to your personal taste. It makes a huge pot and is very filling.


The best part of this was that it called for Creole Seasoning. I know I have seen this around but (of course) I could not find it in time. I decided to make my own Creole Seasoning. I highly suggest it. It is a combination of regular spice-rack items, looks pretty in your pantry and smells so good.


Delicious Jambalaya
Adapted from Food.com

1/2 cup butter
2 yellow onions, chopped
4 stalks celery, chopped
5 green onions, chopped
1 large green bell pepper, chopped
4 cloves garlic, finely chopped
1 chili pepper, finely chopped
2 bay leaves
1 tablespoon creole seasoning
1 teaspoon ground cayenne pepper
1/2 teaspoon dried thyme, crumbled
1 1/2 lbs mild Italian sausage, removed from casing and broken into small pieces
2 cups chicken broth
1 (14 1/2 ounce) can diced tomatoes with juice
3 cups long-grain rice

1. Melt butter in large pot over medium-high heat.
2. Add the onions, green onions, bell pepper, garlic, serrano chile, bay leaves, Creole Seasoning, cayenne pepper and thyme.
3. Cover and cook until vegetables are tender, stirring occasionally, about 15 minutes.
4. Add sausage, broth, tomatoes and rice.
5. Bring mixture to simmer.
6. Reduce heat to low, cover and cook until rice is very tender, stirring occasionally, about
30 minutes to 45 minutes.

Creole Seasoning
Adapted from This Recipe

2 Tbsp onion flakes
2 Tbsp garlic powder
2 Tbsp dried oregano leaves
2 Tbsp dried sweet basil
1 Tbsp dried thyme leaves
1 Tbsp black pepper
1 Tbsp cayenne pepper
5 Tbsp paprika

1. Mix them all together!*

*The original recipe called for 1 Tbsp of celery seed. I thought I had some but didn't realize until too late that I didn't. Next time I will add it as I feel it would add even more awesomeness to the seasoning.


I hope all it well and you will soon return from your second trip and enjoy the settling down and relaxing stage.

I love you and can't wait to see you again!


Love,


Monday, July 16, 2012

PB&J Wedding Cake

My Dearest Sally,

What an amazing day! I could not have imagined it more beautiful than it was and I am so blessed that you were there beside me. Jesse and I cannot thank you and Jason enough for your love and support. We love you very much.

I can hear the many voices along the way telling me that I was crazy to try and make my own wedding cake. This is true. But everyone knows I am a little crazy so they really should not have been surprised. It was a process and a journey that was stressful and OH SO MUCH FUN at the same time. The hardest part was not scraping my oven clean after I did a trial run and filled the pans too full. Nor was it trying to cut the layers perfectly flat or the dowling just right. Nope, nope, nope. The most difficult part was getting Jesse to approve the icing flavour. We tried various forms of buttercream to no avail. They just didn't taste the way icing should apparently! Finally I found a simple recipe for vanilla frosting. Jesse liked vanilla alright but wanted to experiment. I put peanut butter in one small batch and chocolate in another. He loved both of those options but his favorite was the combination! In the end we had peanut butter vanilla frosting with a strawberry rhubarb vanilla filling. Three tiers and many hours later BAM! Wedding cake. The final product was a 10" chocolate pound cake followed by an 8" vanilla pound cake, topped off with a 6" simple white cake. I used three dowling pieces in the bottom two layers for support and I am glad I did. The cake was heavy!


Peanut Butter Vanilla Frosting

(adapted from Wedding Cake Art and Design - Toba Garrett)

1 1/2 cups unsalted butter, room temperature
1 pound (4 cups) icing sugar
1/2 tsp. vanilla extract
1/2 - 1 cup peanut butter (determined by flavour)

1. With an electric mixer, beat butter on medium-high speed until pale and creamy, about 2 minutes.

2. Reduce speed to medium. Add the confectioners' sugar, 1/2 cup at a time, beating well after each addition and scraping down the sides of the bowl as needed; after every two additions, raise speed to high and beat 10 seconds to aerate frosting, then return to medium. This process should take about 5 minutes. Frosting will be very pale and fluffy.

3. Add vanilla, and beat until frosting is smooth. If not using immediately, frosting can be refrigerated up to 10 days in an airtight container. Before using, bring to room temperature, and beat on low speed until smooth again, about 5 minutes.

Simple Vanilla Pound Cake

(adapted from Wedding Cake Art and Design - Toba Garrett)

4 3/4 cups cake flour
4 cups white sugar
1 1/2 tbsp. baking powder
1 tsp salt
1 cup unsalted butter, room temperature
1 pkg. cream cheese
2 tbsp vanilla
5 large eggs
1 cup whole milk

1. Preheat oven to 350. Spray or line the cake pans.

2. Mix the flour, sugar, baking powder, and salt in a large bowl. Mix for 2 minutes on stir speed with the paddle attachment to sift and blend in the ingredients.

3. Add the butter, cream cheese, and vanilla and beat on low speed for 1 minute. Stop and scrape the bowl. Beat for 2 minutes on medium-high speed. Stop and scrape the bowl. Beat for another minute.

4. Whisk the eggs and whole milk together. Add the batter in 3 increments on low speed. Stop and scrape the bowl; then increase the speed to medium and beat for 2 minutes. Stop, scrape the bowl, and then beat for 1 minute longer.


5. Pour the batter into the prepared pans and bake until a toothpick inserted in the center comes out clean.  

I cannot thank Rebecca enough for volunteering her advice and her amazing cake pans. Jesse has decided that I need to make cake more often. Oh what have I done! Jesse and I will begin to tear apart walls next week and plan to have you and Jason over a visit before the summer is out. What is summer without your people?

All my love to you and Jason. God bless and buckle in for whatever we have coming for us! I can't wait.